Today I’m going to walk you all the way through configuring a working, publicly accessible SPARQL endpoint.
Our endpoint is going to run on Amazon’s cloud service. We’re going to working in Ubuntu Linux, using Sesame’s native store as our database, and using the DBPedia ontology as our sample dataset.
Because we’re working in the cloud, pretty much any computer should work for this. Personally, I’m using a 2011 Macbook Pro running OSX Lion. I have no idea how well this works on Windows, but as long as you use the cloud it shouldn’t be much different.
These directions should also by and large work on your local machine (especially if you’re running Ubuntu, and if you aren’t you can always create a virtual instance…if you care to figure out how to do that, because I’m not going to explain it here!)
So, here’s what we’re going to do:
1. Create a server in the cloud
2. Tweak the server to get it ready
3. Download and install Sesame and Tomcat
4. Upload our data
5. Publicly expose the endpoint
6. Celebrate
Here we go…
1. Create a server in the cloud
We’re going to be using Amazon’s cloud services, also known as Amazon Web Services (AWS). AWS offers a variety of different services, but we’re specifically going to be using their Elastic Compute Cloud (EC2) that lets us create fully functional virtual servers. (“Virtual” just means that our server is an illusion created by software running on Amazon’s servers rather than being an actual physical machine, but for nearly all functional purposes it’s exactly the same).
Amazon has great guides for getting started with AWS, so I’m going to just cover the very minimum you’ll need for this purpose. If you want to actually use your server for anything, you should review the official documentation (and use it or Google to troubleshoot anything that goes wrong.)
So, to get started go to http://aws.amazon.com and either sign in or sign up for a new account.
You’ll need a credit card, but everything we’re going to do in this demo will actually be extremely cheap (probably <1$) because most AWS functions are free for light usage. Once you’ve signed up, you’ll see the AWS Management Console.
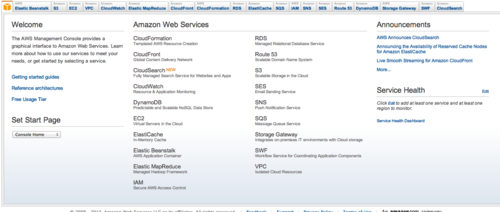
Click on the “EC2” tab.

Now click the big button that says “launch instance”. Click “Classic Wizard”, then click “Community AMI”. An AMI is a server image. They let you save the configuration and contents of a server and then create a new one with the press of a few buttons. Amazon provides a few for various configurations of Linux and Windows, and you can find others on various websites (such as for different distributions of Linux).
[In case you’ve never used Linux: Unlike Windows or OSX, Linux is more of a “tree” of many slightly different operating systems that come from a common root. The different branches of the tree are called “distributions” or “distros”, and there are a lot of them. They each have their own advantages and disadvantages, but overall which one people choose seems to be mostly a matter of taste. Right now, the most popular one seems to be the “Ubuntu” distribution. It’s the one I’m most familiar with, so we’re going to use that.]
You can get a clean image of Ubuntu for EC2 from the Ubuntu website, but “clean image” means that there is virtually nothing installed. I’ve created an Ubuntu image that has a few essential programs installed, plus a program called “NX” that lets us open a graphical interface for our server instead of just controlling it through a command line.
You can find this AMI by typing “ami-f8ce1491” into the search window. Click “select”. Click “continue” three times until you get to the window that lets you enter a name for your server. Enter something memorable, then click continue again. On the next screen, you’ll need to create a “key pair”, which is a set of public and private SSH keys that you’ll use to connect to your server (since passwords aren’t considered secure enough.) Name your key, and download it to somewhere memorable.
On the next screen, click “create a new security group”. Enter a name, and in the add rule box, click select “All TCP” and click “add rule”. NOTE: THIS IS EXTREMELY INSECURE. IF YOU WANT TO ACTUALLY USE THIS FOR PRODUCTION OR STORE ANYTHING REMOTELY SENSITIVE ON YOUR SERVER, YOU’LL NEED TO BE MUCH MORE CAREFUL WITH SECURITY. But that’s time consuming, so we’re not going to worry about it now.
Now click “launch”! Wait a few moments for Amazon to create the instance, and you’ve got a server.
2. Tweak your server to get it ready
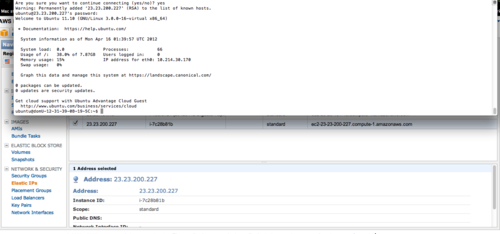
Lets get this server ready. First, let’s make it easy to access by giving it a fixed IP address. From the AWS console, click “Elastic IP’s” in the pane on the left. Click the “Allocate New Address button on top”, then click “Yes, Allocate”. Now click the “Associate Address” button up top. Choose the name of the instance you just created, and click “Yes, Allocate”. Now you can reach your server by that IP address (though you will have to re-associate it if you ever shut down your server.)
[Note: if you ever terminate (as opposed to ‘stop’) an EC2 server, it is destroyed and you cannot get it back! So terminate with caution, if at all.]
You can login to your server using the “ssh” program, which creates a secure connection between your local computer and the server. Try it now to make sure it can connect. Open up a command line (using the ‘terminal’ program on a Mac or Linux, or get a program called ‘Cygwin’ on Windows.)
Type in:
myusername$ ssh ubuntu@your.ip.addr.here
[Note: I’ll use ‘myusername$’ to indicate a command prompt. Don’t type that in!]
You’ll get a message asking if you want to add the server to your list of accepted hosts. Hit enter.
You’ll be prompted for a password, enter ‘ubuntu’. You should now be connected to your server:
You can do a remarkable amount from this little terminal connection, but life would be easier if we could interact with our server through a graphical user interface (GUI) like we’re used to. Let’s make that happen.
On your local machine, visit http://www.nomachine.com/download.php and download the NX client for your OS. Install it as prompted, then open it up. When the window opens, click “new connection”, then enter the IP address of your server. Click on your new connection, and you should be prompted for a password and username. Enter username “ubuntu” and password “ubuntu". Click “create new connection” and select “Create a new GNOME desktop” (GNOME is a program that creates a GUI interface for a Linux server.)
NX has a bug where sometimes it won’t let you login to a freshly created Amazon instance. If you get a “user authentication” error, you need to remove and reinstall NX. So go back to your command line and type:
myusername$ sudo apt-get remove nxclient
(hit yes)
myusername$ cd ~/Downloads
myusername$ sudo dpkg –I nxclient (hit tab to autocomplete)
myusername$ sudo dpkg –I nxnode (hit tab to autocomplete)
myusername$ sudo dpkg –I nxserver (hit tab to autocomplete)
One more little irritation…Ubuntu apparently does not come with Java installed. A very large percentage of Semantic Web tools are written in Java, so we’re going to need that. To grab it, simply enter:
myusername$ install java sudo apt-get install openjdk-6-jdk
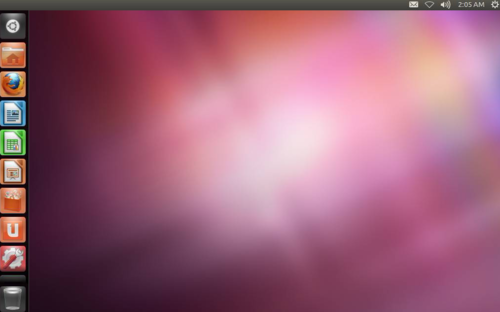
Now we’ve got a nice clean remote desktop.
3. Download and Install Sesame and Tomcat
Now that we’ve got a basic environment set up, we can start installing our actual Semantic web tools!
A quick rundown of what we’re going to use:
Sesame is a substantial package of libraries (i.e. reusable chunks of code) that provide a variety of useful functionality for working with Semantic data. Sesame provides a parser (Rio) that can read strings and interpret them as RDF, a SAIL (a.k.a “storage and inference layer”) which is an API (application programming interface, i.e. a set of standardized functions that can be integrated into other programs), a built in “Native” Triple Store (a database for RDF), a webapp (“Sesame HTTP Server”) that lets you control a Triple Store directly from a webpage and also handle simple HTTP requests, and some other stuff as well.
Sesame is modularized, so you can use as many or as few of these libraries as you want. In this demo, we’re going to focus on the web app (which bundles along most of the other lower-level functionality). To get it, go to http://www.openrdf.org/download_sesame2.jsp, follow the links to the download page, and download the latest version (2.6.5 as of this writing) onto your EC2 server (I’m assuming you’re using NX and so you can do this from Firefox, but you can also find the exact link on your local web browser and download via command line using the “wget” utility.)
In order to use the webapp, we need a server that can actually communicate with the outside world and forward web requests along to Sesame. The two main options for this are the Tomcat Server and the Jetty server. They’re very similar (from what I can tell), but we’re going to use Tomcat because it seems a bit slicker and better supported (it’s an Apache project.)
You can download Tomcat from http://tomcat.apache.org/download-70.cgi Choose an appropriate mirror, and download the tar.gz file under “Core:”
Open a terminal (hit the Windows or Command key and type “Terminal”), open the folder you’ve downloaded into (/home/ubuntu/Downloads unless you’ve changed something), and “unpack” tomcat by typing:
myusername$ tar -xvf apache-tomcat-7.0.27.tar.gz
[Note: the “.gz” suffix stands for “gzip”, which is a Unix compression utility basically similar to WinZip, and “.tar” stands for “tarball”, which is a file format that compresses a bunch of files into a single file.]
Now you can run Tomcat directly from your downloads folder, but that’s a bit sloppy. Let’s put it somewhere more normal:
myusername$ sudo mv apache-tomcat-7.0.27 /var/local/
Now you can find your Tomcat server by going into the /var/local/ directory.
Let’s start Tomcat to make sure it works:
myusername$ /var/local/apache-tomcat-7.0.27/bin/startup.sh
You should see this:

Test that it’s working by opening up Firefox (through NX) and visiting http://localhost:8080 and you should see:
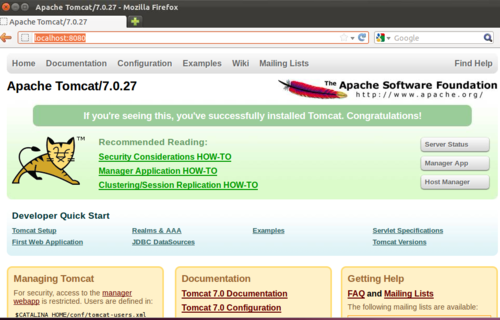
[Note: When one computer talks to another through “TCP” (transmission control protocol), it does so by transmitting data through “ports” which are like “lines” on a telephone. You have 65535 ports on your computer, and the :8080 means that you are communicating with the Tomcat server through Port 8080]
Let’s shut the server down and go Sesame.
First:
myusername$ /var/local/apache-tomcat-7.0.27/bin/shutdown.sh
Now, we have to put Sesame somewhere that Tomcat can find it. Web apps are contained in .war files, and we’re going to find the Sesame .war and copy it into the “webapps” subdirectory of the Tomcat directory:
myusername$ cp ~/Downloads/openrdf-sesame-2.6.5/war/* /var/local/apache-tomcat-7.0.27/webapps/
This will move two files: openrdf-sesame.war and openrdf-workbench.war. The first provides just the basic Sesame functionality without the web-based dashboard. The second gives you the dashboard, which is very useful for simple work.
That should be all you need to do to get the dashboard working. To test, let’s startup the Tomcat server again:
myusername$ /var/local/apache-tomcat-7.0.27/bin/startup.sh
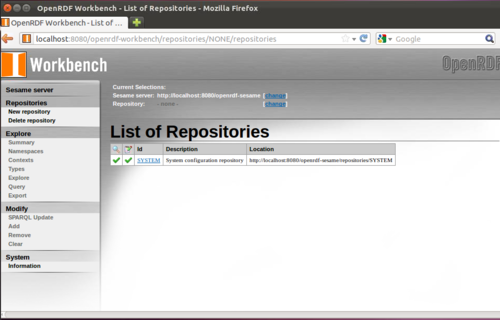
Now inside of Firefox, navigate to http://localhost:8080/openrdf-workbench.war You should see:
4. Upload our data
There are a number of tweaks that you can make to Sesame and Tomcat to make them work better for your particular purpose, but the configuration we have right now is good enough for basic tasks. So let’s start uploading some data right away!
We’re going to use a sample dataset taken form the UK government’s foray into Open / Linked Data, www.data.gov.uk.
We’re going to use the “finance-statistics” dataset which contains summary information about British public expenditures.
Download the dataset here: http://source.data.gov.uk/data/finance/finance/2009-09-30/finance-statistics.zip
From the command line, navigate to the folder and unzip the file:
myusername$ ~/Downloads
myusername$ unzip finance-statistics.zip
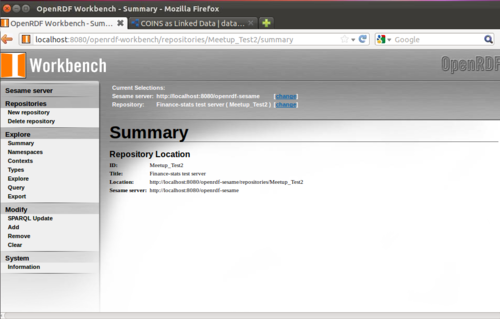
Now, head back to the Sesame webpage (http://localhost:8080/openrdf-workbench). In Sesame, data is stored inside of “Repositories” (think individual filing cabinets), so the first thing we need to do is create a new repository.
From the first page, click “new repository” from the Nav Bar on the left.
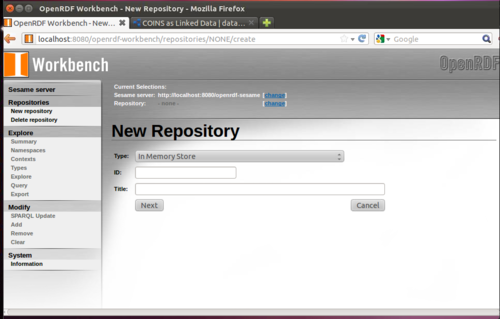
Sesame has a number of different types of repositories tuned for different purposes. The simplest is the “in memory” store that is optimized for smaller amounts of data that can all fit…in memory. (Don’t worry – the data is saved on disk and can be reopened later after you shut down the server.) If you want to load a large amount of data, try the “Native Java” store. And if you want to do serious heavy-duty work, consider one of the other commercial Triple Stores like OWLIM or Bigdata that uses the Sesame SAIL but replaces the native repositories.
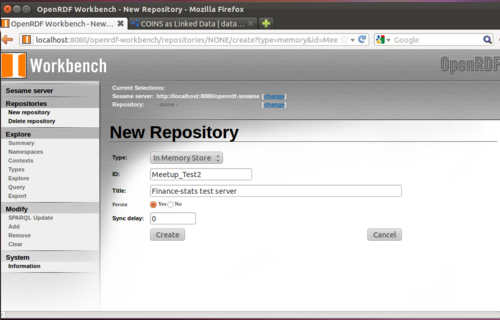
We’re staying small, so the In Memory store will be fine for us. Give your repository a name and description and click next.
Leave everything on the next page the same and click “create”. You’ve got a repository!
Now, to add some data, click “Add” on the nav bar.
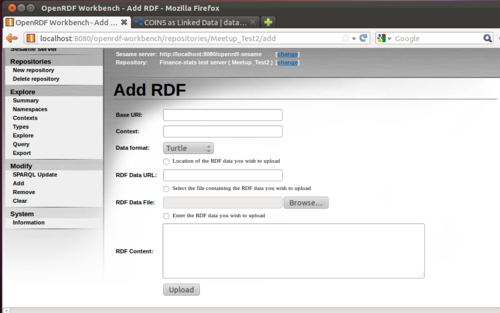
Under “base uri” enter http://www.data.gov.uk (Sesame uses this to track where data came from), and leave “context” blank. The file we’re uploading is in the RDF/XML format (i.e., it’s pretty much in XML), so select RDF/XML as Data Format. Click “browse” and locate wherever the unzipped finance-statics.rdf file is.
Now, click upload.
This dataset is small, so it should upload almost immediately.

Let’s run some queries. Click “query” on the left.
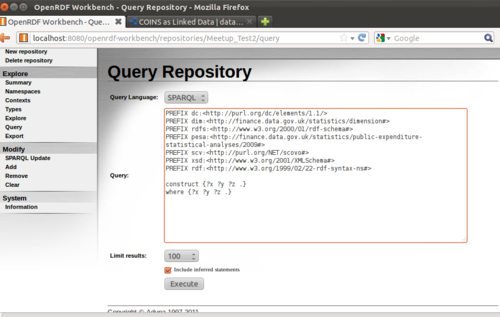
Enter a simple “CONSTRUCT” query that will return 100 random triples.
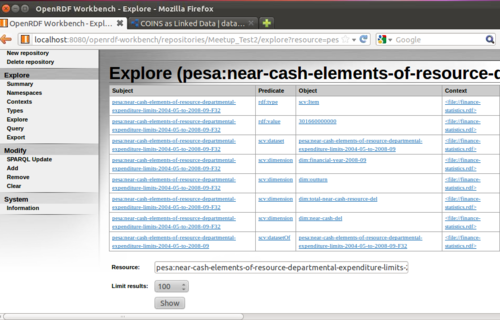
You can now click the blue links to get all the triples that each link is the subject of.
Cool, huh? You can find much more detailed instructions about everything else Sesame can do on the openrdf website.
5. Make it public!
The big advantage of using EC2 is that it’s super easy to turn this into a true public endpoint. If you gave the server an elastic IP earlier and set the security to completely open, it should be possible to access it right now.
From your local machine, just visit http://your.ip.adr.here:8080/openrdf-workbench
Tada!
6. Celebrate
That’s it. You’re done! Only with this little exercise of
Next…there is a vast, vast world of Semantic Tools and Semantic data that you can learn to help you accomplish nearly any data-related task.
The natural next jumping off place would be to learn how to use the Sesame API directly from Java so that you can build big and exciting semantic applications. Or you can learn how to use the REST paradigm to send SPARQL queries to your fancy new public endpoint from inside of other programs you write (or even from a website built with Python/Django). Or you can learn how to use a more powerful Triple Store to handle huge amounts of data (Sesame’s native stores only work up to around ~100 million triples).
It’s a big world. Go forth and enjoy.